|
||
|
|
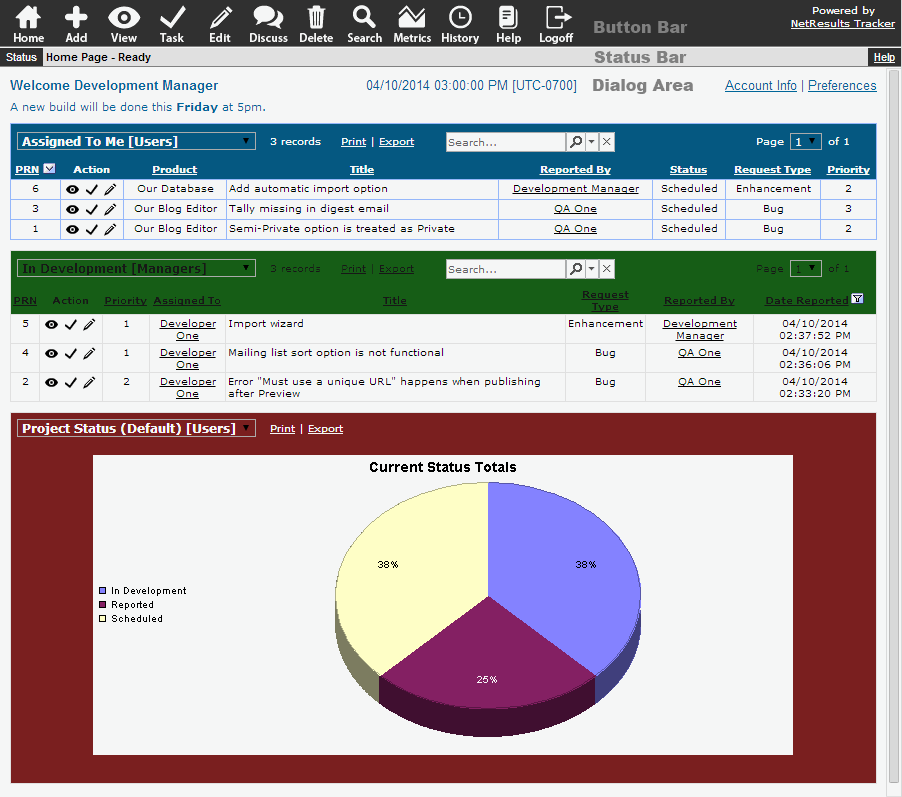
After logging in, the first screen you will see is your Tracker Home Page. By default, this page has two reports, which display the records assigned to you and the records reported by you. Also present on the Home Page is a link to the personal preferences section, where you can customize various user settings, such as changing your password and selecting date and report settings. A link to edit your account information may also be displayed depending on the privileges granted to you by your system administrator.

Report Layout
You can customize the columns of the reports displayed on your
home page either by creating your own saved report layout or selecting
an existing saved report layout.
Please refer to the section Using Saved
Queries & Reports for details.
Report Query
You can customize the query "Assigned To Me"
with a query of your choice by defining your own personal saved
or advanced query and selecting it for the First Home Page Report field
in the Personal
Preferences page. Alternatively, you can select an existing saved or advanced query
for this
first home page report as well. You can customize the query "Reported
By Me" using the Second Home Page Report field in the Personal Preferences page.
Information on selecting the queries for the Home Page reports via the
Personal Preferences page is described in the section below.
Please refer to the section Using Saved
Queries & Reports for details on how to create your own saved query
or refer to the section Advanced Queries
for information on creating advanced queries.
Dynamic Report Selection
You can view different saved queries or charts on the Home page at any time by
clicking on the pulldown menu above each report. Any saved query or chart
to which you have access will be displayed in the pulldown for selection. To permanently
change the reports displayed on the Home Page when you first log into
Tracker, you will need to select the desired reports in the
Preferences section.
Dynamic Report Searching
You can perform a text search within the query results on a Home Page report.
For example, you may wish to find all the records in the query results that have
"database" in the Title field as shown in the sample below.

To search within the query results:
 dropdown icon to select in which fields
you wish to search. Selecting "<All>" will search the
available fields for the key word(s) or phrase entered (this is the
default selection). Or, choose specific fields to be searched.
You can select multiple fields by holding down the Ctrl
button on your keyboard as you make your selections.
Date and Link type fields are not available for selection. If you wish
to find a subset of the query results based on a Date field, you can use the
range filtering option.
When searching for a specific PRN, you must enter the full PRN including the short name, if applicable. For example, if you are trying to find the ticket SUP20, entering only "20" will not return this record. You must enter "SUP20" into the Search text box.
When choosing a Release Number field to search within, the value you enter into the Search text box will be searched within each individual digit of the Release Number field. For example, you can search using values like "1", "Beta 2", etc. Basically, you can search for the items that are configured as choices in the Release Number field. However, you cannot search for a combination of multiple digits at once. For example, if you enter "1.2" into the Search text box in an attempt to find records that have values like "1.2.0.None", "1.2.0.Beta 1", "1.2.1.-", you will get 0 matches because it will search for the value "1.2" within each individual digit of the Release Number.
You can choose one of the available search methods: "Any Word" (default selection), "All Words", "Exact Phrase", "Boolean Expression". An explanation of each of these methods is available in the Full Text Search section of the Query Page.
 Search icon to run the search. Any matches
will be displayed.
You can click on the
 remove icon to remove the search criteria
and reset to the defaults (no key word(s) or phrase in Search
text box, "<All>" selected, Search method is "Any Word").
This will display the original set of query results.
If you choose to run another search while a subset of the query results is displayed, the new search will be done against the entire set of original query results. For example, if a query returns 12 matches and you run a text search that returns 5 matches. If you run another search while those 5 matches are displayed, the new search will search against the original 12 matches (not only within the 5 that matched your last search).
If you have applied any filters, the excluded items will not be included in the results of any searches done within the query results.
Dynamic Report Range Filtering
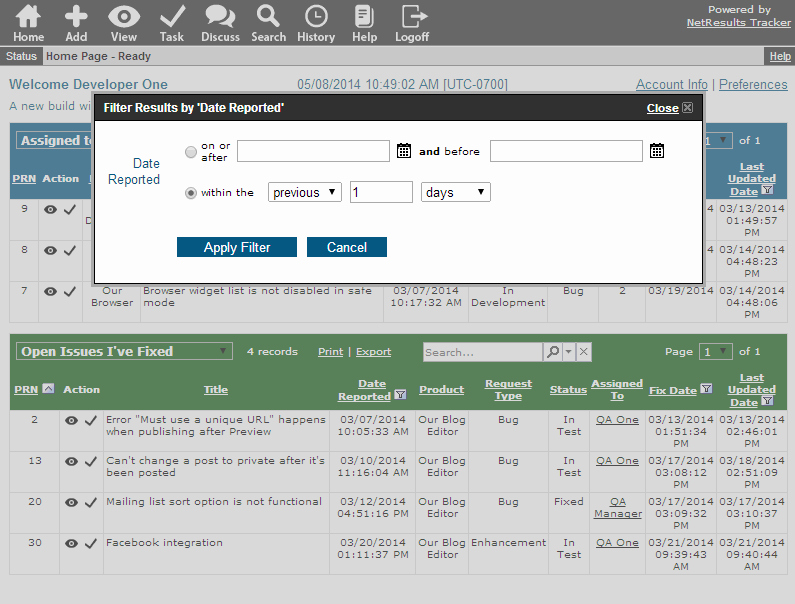
 Range Filters can be applied to show a subset of the query results. Range Filters are available
for Date, Floating Point and Integer type fields. For example, you may wish to see records
that fall into a certain date range.
Or, you may wish to see records that have a value
greater than or less than a certain value in
Floating Point or Integer fields. In the sample below, a filter is being applied to show
only those records with "Date Reported" within the previous week.

To apply a filter:
 empty filter icon next to the field
name in the column heading
 calendar icon to select a specific date.
Or, you can select a date relative to the current date and time using the "within the"
option.
For Floating point and Integer fields, you can select one of the conditions (<, <=, >, >= and =) and enter a value. You can also specify a range by selecting another condition and entering a value in the "and" option.
 full filter icon next to the field
name in the column heading
Dynamic Sorting of the Results
The initial sort order of reports on the Home Page is based
on the selections made in the Sort By options in the
saved query. You can change the way the reports on the Home page are sorted at any time
by clicking on the field name. The field that is being used as the primary
sort field will have an arrow to the right of the field name. If the arrow is pointing
down, the results are sorted by that field in a descending order. If the arrow is pointing
up, the results are sorted by that field in an ascending order. Clicking once on the field
with the arrow will reverse the sort order. Clicking once on any field that
does not have the arrow will sort the results in ascending order by that field. Any field
except TextArea type fields can be clicked to sort the results by that field.
Please note that when the preference
Exclude Time From Reports is enabled and a Date field is selected in the
Sort By section of the saved query, the report results will be sorted by the time in each record
even though the report will not display the time information.
When PRN (Record ID) is selected
for one of the Sort By fields, the records will be ordered according to the numeric component of
the PRN (Record ID) field. The short name of the form will not be used as part of the sorting when
PRN (Record ID) is selected. For example, let's say you have PRNs "REC1" and "REC2". The sorting
will be done using "1" and "2", ignoring the "REC".
Other Features of the Home Page
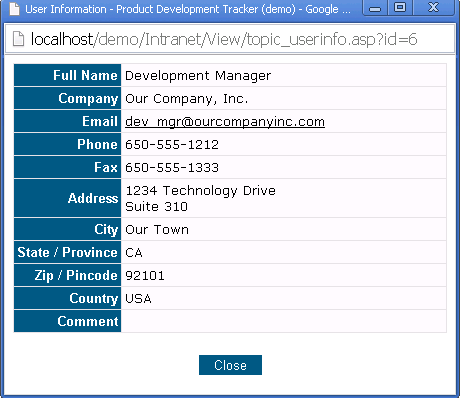
When the Assigned To or Reported By fields are displayed as columns on a Home
Page report, the user's name will appear as a clickable link if you have the appropriate
privilege. Click on the user's name to display the user's profile information as
shown below.

There is one Export link for each report displayed on the Home Page. The records displayed in each of the Home Page reports can be exported to a CSV file (comma separated values format) by clicking on the Export link to the right of the Report Pulldown at the top of the report. You can then open this file with another tool such as Microsoft Excel or Crystal Reports. Please note that when the preference Exclude Time From Reports is enabled and a Date field is displayed in the report layout, the time information will not be included (only the date) when exporting the Home Page reports.
If you have exported Metric (chart) data, you can create a chart in Microsoft Excel from the exported data by doing the following. Open the file in Excel and "rubber band" (left-click mouse and drag a rectangle around) the data plus column and row titles (exclude rows 1 through 3, but include the individual row/column titles in row 4 and column A along with the data in your selection) and click the Chart Wizard icon (or select Insert->Chart...). Click the Finish button in the Chart Wizard to accept the Microsoft Excel default settings for the chart; or make selections, click Next button, then click Finish to create a chart with custom settings. Please review the Microsoft Excel Help for further information on Excel charts.
To print the results of a report or chart displayed on the Home Page, click on the Print link to the right of the Report Pulldown at the top of each Home Page Report. When a report is displayed on the Home Page, clicking on the Print link will print all of the records that match the Saved Query (including those records not shown on the Home Page when the number of records in the query results exceeds the maximum number of records displayed per page). Please note that when the preference Exclude Time From Reports is enabled and a Date field is displayed in the report layout, the time information will not be included (only the date) when printing the Home Page reports.
When you log in, you are given access to data and operations as assigned by your Tracker administrator. These rights are assigned to you via User Groups. Each group defines a set of privileges, and you are assigned to groups. The total set of privileges you have is the sum of all of the rights for all of the User Groups in which you are a member.
Please contact your Tracker administrator if you wish to receive additional privileges.
NetResults Tracker © 1997-2015 NetResults Corporation. All rights reserved.