|
||
|
|
A record can be edited to make changes to the fields, attachments, source code files, alerts and record visibility. In organizations where the workflow process is very structured, the Edit operation is generally reserved for managers or users who need to handle special cases as they arise while the majority of users use the Task operation to process records. In organizations where processes are less formal, the Edit operation may be the preferred method of processing records for all users.
There are various ways to perform the Edit operation:
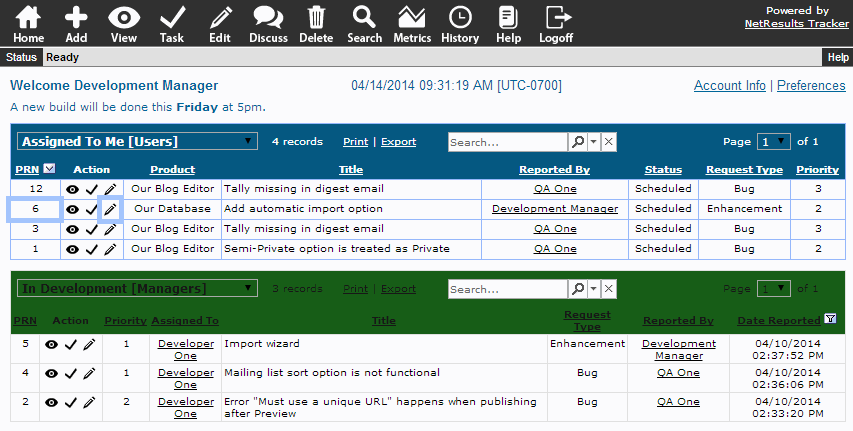
From a report on the Home or Query pages:
Click on the Edit icon to the left of a record in the report.
Using the Edit icon in the Button bar:
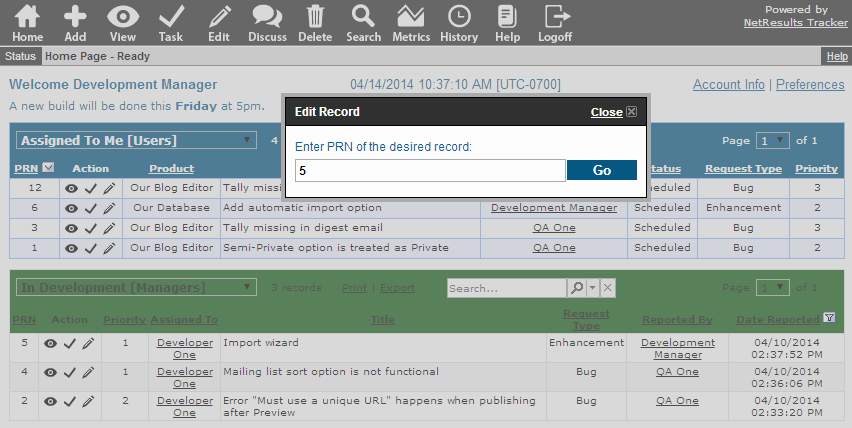
Click on the Edit icon on the Button bar at the top. The Search Window will appear.
You can enter the record number you would like to see and click Go to
go to the Edit Page of the record specified.
Once you've selected a specific record, the Edit Page will be displayed.
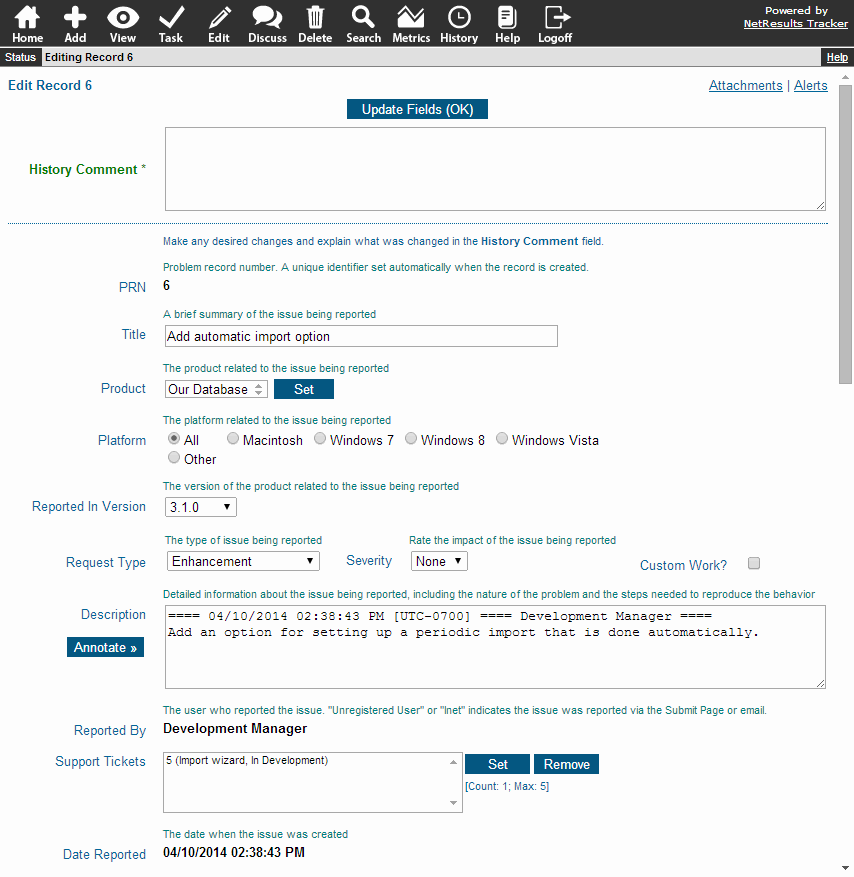
The edit form allows you to directly modify any field of the record. This can be useful if you wish to update a description, or force a record to a particular process state (for instance, mark a record as "Released" before it has been tested). After making changes to the fields on the Edit page, click on the Update Fields (OK) button to save your changes.
If you have made changes to the fields on the Edit page, but do not wish to save the changes, you can click on the Cancel button to abort your changes and immediately return to the previous page you were viewing. Or, if you have made changes, but wish to reset the fields to their previous values (the values the fields had before you made changes), you can click on the Reset button to restore the original values of the fields.
When you edit the record you can also enter a comment that will be saved in the history for the record. This can be useful in the future to help determine why the record was edited. Up to 2000 characters can be entered into the History Comment field.
The field help will be displayed if you have checked the
box for the Enable Field Help
preference
and your Tracker Administrator has entered information to describe
this field. If a Field Help icon  is displayed, move your cursor over the icon to see a description
of the field.
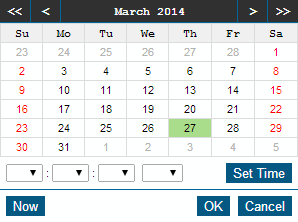
When a date field is present on the Edit Page, you can click on the calendar icon to select a date or you can manually enter a date in the appropriate format (e.g. "mm/dd/yyyy HH:MM:SS AM/PM" or the date & time format selected in the Preferences section.). The time component is optional. Click on the day to select the date to be entered into the date field. Click < or > to move backward or forward one month or click << or >> to move backward or forward one year. Click Now to set the date field to be the current date and time. Click on Exclude Time if you want to exclude the time information from being saved in the date field. For a field where the time information has previously been excluded, click Set Time if you wish to include the current time information in the field. Click OK to choose the highlighted date to be entered into the date field. Date will be selected and calendar dismissed when a date is clicked when the time is excluded. Dates displayed in red are non-business days according to the Business Days option in the Preferences section. Click Cancel to dismiss the calendar without saving changes.
When large text fields (TextArea) are present, an Annotate button will be displayed to the left of the field. Clicking on the Annotate button will add a date and time stamp with your User ID to the field. This makes it easy to distinguish which information within the field has been added by you or another user.
To view the full contents of the large text fields, use the scroll bar on the right of the field. Alternatively, the number of lines displayed for these large text fields can be customized by setting the value of the field Display Window in the Multi-line Field Settings section on your Preferences page.
When a pulldown field is present on the Edit page, it may be displayed as a traditional pulldown, radio buttons, vertical radio buttons or a search pulldown. When a field is displayed as a search pulldown, you can enter key words to find any option menu items that match your criteria. To make a selection in a search pulldown, click on the Set button to the right of the field, type in one or more key words and click on the Find button. Any items that matched your criteria will be displayed, click on the item you wish to select, then click on the Set button (or simply double click on the item you wish to select).
Your Tracker may have been configured to have dependent pulldown fields. Dependent pulldowns are pulldown fields where the option menu values displayed in one pulldown are determined by the value selected in the pulldown it is dependent on. If you change the value selected in a parent pulldown field, it may change the values available in the child pulldown menu based on the relationship set up between the two fields.
After clicking on the Update Fields (OK) button, if your Tracker workgroup is set up to send email notification messages when records are edited, you will see a message "Sending Email Notifications...Please wait" in the Status bar. This message indicates that the changes have been made to the record and Tracker is sending the email notification messages.
Link Fields
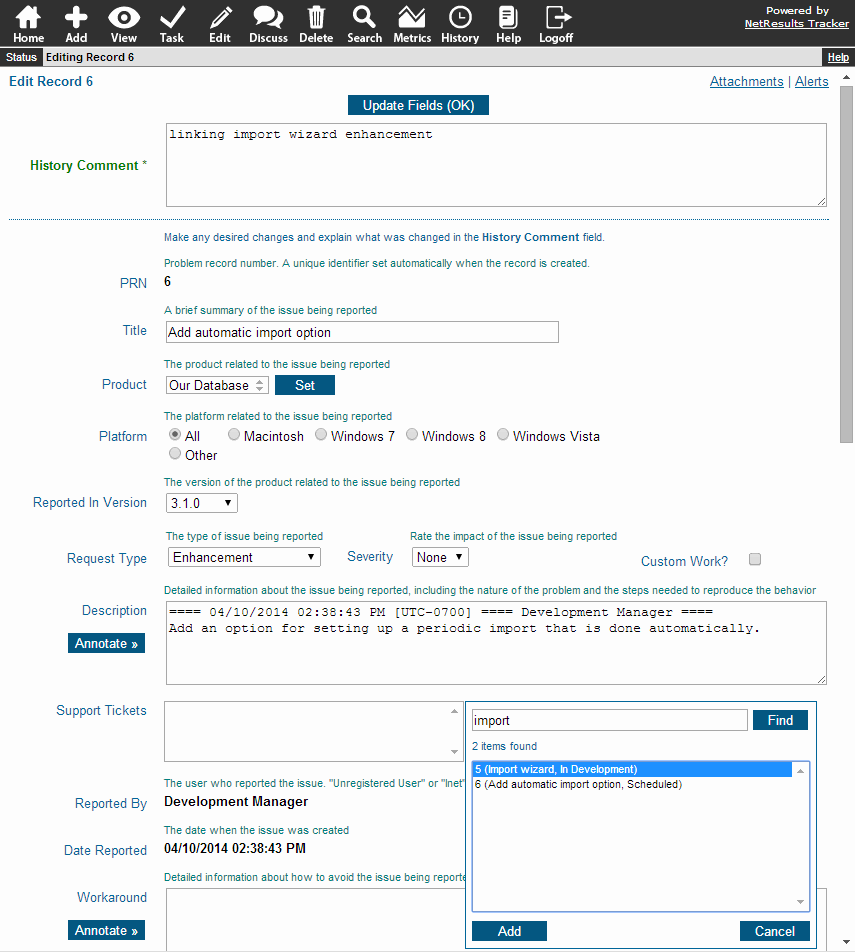
Link fields are fields that allow records to be linked to one another. For example, if different types of forms are available in your Tracker workgroup, your Tracker Administrator may have set up Link field so records created by one form can be linked to records created using another form. When a Link field is included on the Edit Page, any records that have been linked will be displayed. To add items to the Link field, click on the Set button. A list of items that can be added will be displayed (if you are using a browser other than Internet Explorer, the list will not be displayed until you click on the Find button). To search for items using a key word(s), type the key word(s) into the Search Criteria field and click on the Find button. Any items that matched your key word(s) will be displayed. The key word(s) are searched within the key fields for the forms you are searching. Because Tracker can support multiple projects and forms, the Tracker Administrator can select key fields when creating a form. To find out which fields are the key fields for a certain form, go to the View Page for a record. The values of the key fields will be displayed in bold. In the View Page sample, the fields "PRN" and "Title" are the key fields as their values are displayed in bold. When a Release Number field is a key field, the value you enter into the Search text box will be searched within each individual digit of the Release Number field. For example, you can search using values like "1", "Beta 2", etc. Basically, you can search for the items that are configured as choices in the Release Number field. However, you cannot search for a combination of multiple digits at once. For example, if you enter "1.2" into the Search text box in an attempt to find records that have values like "1.2.0.None", "1.2.0.Beta 1", "1.2.1.-", you will get 0 matches because it will search for the value "1.2" within each individual digit of the Release Number.
To select an item, click on the item. To select multiple items, hold down the Ctrl button on your keyboard while clicking on the items to be added. Click on the Add or Set button to add the selected items to the Link field. To remove items from the Link field, click on the item, then click on the Remove button. To select multiple items, hold down the Ctrl button on your keyboard while clicking on the items to be deleted.
If the Link Field has been configured to allow more than one item to be linked, you will see the total number of items that are currently linked ("Count") and the maximum number of items ("Max") that can be linked below the Set and Remove buttons.
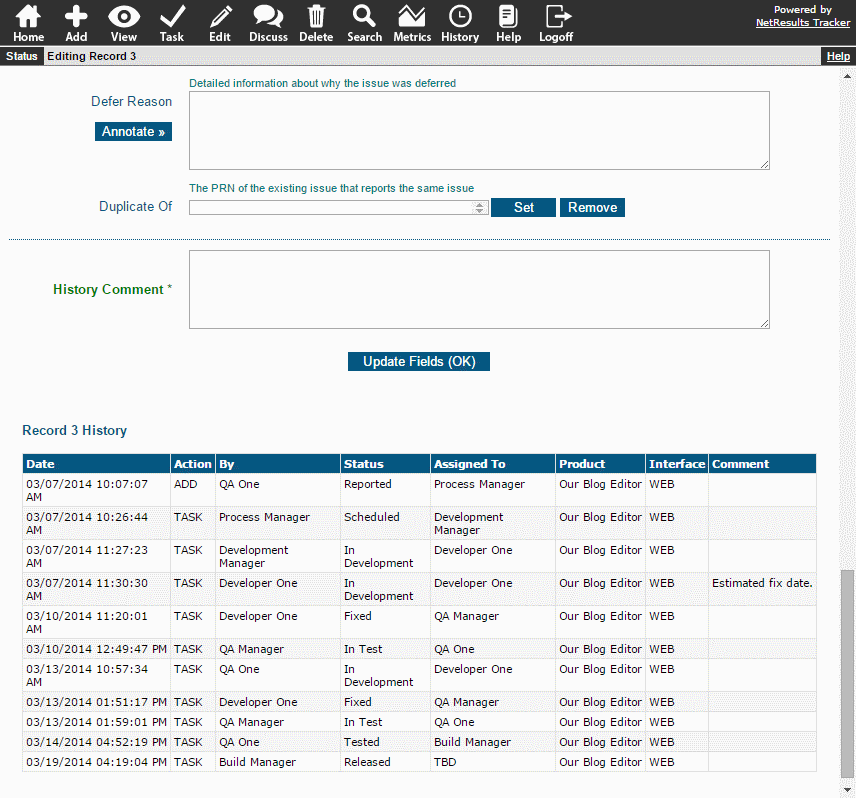
If you have been assigned permission to view the Record History on the Edit Page, it will be displayed below the fields.
The edit page also allows you to add, edit, or remove an attachment for the record. The Record Attachments section contains more details.

If you have been assigned permission to edit the source code list, you will be able to add, edit or remove source code files for the record. The Source Code Control section has more details about this feature.
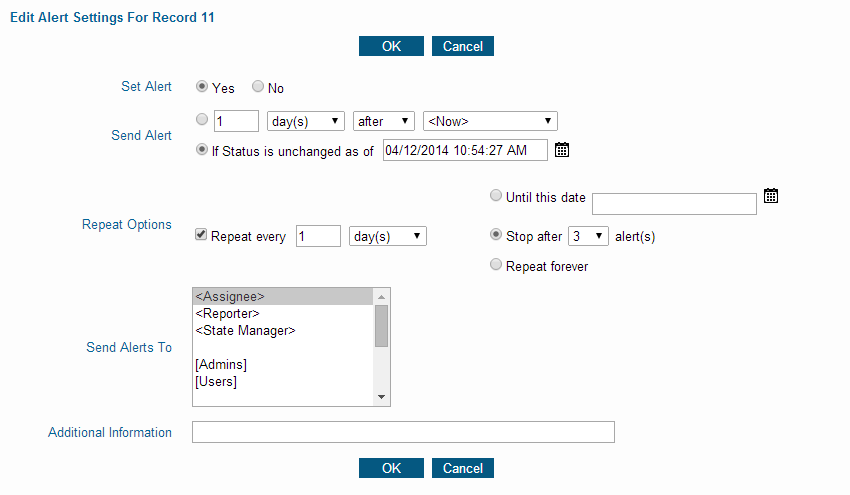
If you have been assigned permission to edit the alert settings for a record, you will be able to set up an alerts for the record as shown below. Refer to the Alerts section of this Help Guide for more information on setting an Alert for a record.
If Record Visibility has been enabled, and you are a member of a user group that is allowed to modify the visibility of a record to user groups, the field Make Visible to These User Groups will appear. This field is a selection list at the bottom of the page which allows you to select to which user groups this record should be visible. To select more than one user group, hold down the shift or control key while clicking on the user groups. If you wish to make a record visible only to the Admins user group, click on the blank space at the bottom of the list.
NetResults Tracker © 1997-2016 NetResults Corporation. All rights reserved.