NetResults ProblemTracker
Using Microsoft Access

Set Up the MS Access Data Source

ProblemTracker installs a template database file named BUGTRACK.MDB in the web server content /versionDir/Database directory, where versionDir is the content subdirectory of the version of ProblemTracker installed. This is a Microsoft Access database file.

You must export this database file as an ODBC datasource (System DSN).

For Windows NT/Option Packs
Open the Control Panel and looking for an icon labeled either "ODBC" or "32bit ODBC". If you can locate this icon, then these components are installed on your system and you click on a link below to proceed to the specific installation instructions for your database:

For Windows 2000 Server
The following item should be in your start menu.
Start->Programs->Administration Tools->DataSource (ODBC)
You can click on this item to proceed to the specific installation instructions for your database.

The name of the System DSN is determined by which version of ProblemTracker is installed, as shown in this table:

ProblemTracker Version System DSN Name
Software Development #1 ptdev
Web Site Development ptweb
Software Development #2 ptdev2
Software Development #3 ptdev3
Software Development #4 ptdev4

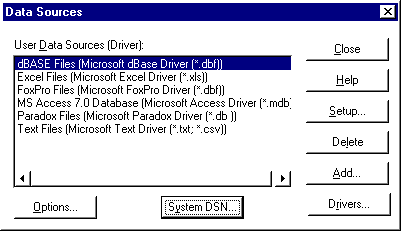
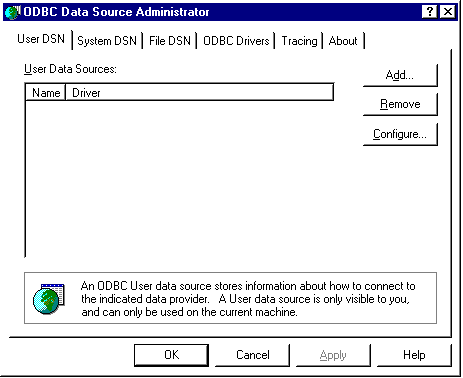
The ODBC Administrator can look like one of the two images below:

ODBC Administrator Style "A"


ODBC Administrator Style "B"


Using ODBC Administrator Style "A"

If you are using the ODBC Administrator Style "A", please follow these steps to export the ProblemTracker database as a System DSN:

  1. Start the Control Panel ( Start->Settings->Control Panel ) and double click on the icon labeled "ODBC" or "32-bit ODBC".
  2. In the dialog that appears, press the button labeled "System DSN".
  3. In the dialog that appears, press the button labeled "Add...".
  4. In the dialog that appears, select "Microsoft Access Driver(*.mdb)" from the list of installed drivers and press "OK".
  5. In the dialog that appears, enter the appropriate DSN name in the field labeled "Data Source Name", and press the button labeled "Select..."
  6. In the dialog that appears, located and select the BUGTRACK.MDB file that was installed with ProblemTracker. Press "OK".
  7. Press "OK"
  8. Press "Close"
  9. Press "Close"

Using ODBC Administrator Style "B"

If you are using the ODBC Administrator Style "B", please follow these steps to export the ProblemTracker database as a System DSN:

  1. Start the Control Panel ( Start->Settings->Control Panel ) and double click on the icon labeled "ODBC" or "32-bit ODBC".
  2. In the dialog that appears, click on the tab labeled "System DSN".
  3. Press the button labeled "Add...".
  4. In the dialog that appears, select "Microsoft Access Driver(*.mdb)" from the list of installed drivers and press "Finish".
  5. In the dialog that appears, enter the appropriate DSN name in the field labeled "Data Source Name", and press the button labeled "Select..."
  6. In the dialog that appears, located and select the BUGTRACK.MDB file that was installed with ProblemTracker. Press "OK".
  7. Press "OK"