 The Metrics operation is a way to gather and display statistical information
based on your ProblemTracker data. The information can be displayed as
bar, pie, or line charts using system defined or user defined Chart Layouts
to specify the format for the chart. You can limit the records used as input
to the statistical calculations (Input Records) by specifying a
Saved Query.
Only those records which match the Saved Query will be used when performing
the statistical calculations.
Chart parameters can be stored away for future runs as Saved Charts (for
global, group, or personal use).
The Metrics operation is a way to gather and display statistical information
based on your ProblemTracker data. The information can be displayed as
bar, pie, or line charts using system defined or user defined Chart Layouts
to specify the format for the chart. You can limit the records used as input
to the statistical calculations (Input Records) by specifying a
Saved Query.
Only those records which match the Saved Query will be used when performing
the statistical calculations.
Chart parameters can be stored away for future runs as Saved Charts (for
global, group, or personal use).
Generating a Chart
A chart can be generated using the "Project Status (Default) [Users]" Saved Chart or
any other saved chart that has been added by a ProblemTracker user with the
appropriate privilege(s) by performing the following steps:
- Select a chart from the "Saved Chart" pulldown field (by default, only the
default saved chart "Project Status (Default) [Users]" will appear in this field
- The options displayed in the Chart Layout, Input Records, and Chart Title
fields will be automatically filled with the settings in the Saved Chart selected.
If desired, make other selections for the Chart Layout, Input Records, and Chart
Title fields.
- Click on the "Show Chart" button to display the chart.
- Make changes to the formats of the chart displayed by using the
Dynamic Chart Layout Options. Details on the options available
can be found in the Chart Layout Options section.
- To change the parameters used to display the chart, click on the "Change Parameters"
button to return to the Chart Selection page.
Set a Default for the Metrics Page
You can set a default such that whenever you click on the Metrics icon
a particular Saved Chart, Chart Layout, Input Records, and Chart Title will be
ready to be displayed by clicking on the "Show Chart" button. By setting a
default, you will be one click away from
seeing your default chart when you go to the Metrics page. This is useful
if there is a particular chart you will be displaying on a frequent basis.
To set a default for the Metrics page:
- Select a Saved Chart, Chart Layout, Input Records, and Chart Title to be used
to generate your default chart
- Click on the Set as Default button at the top
Save
The "Save" operation allows you to change the saved chart layout, input records,
or chart title associated with a saved chart. You must have the appropriate
privilege to perform this operation on a group saved chart. To make changes to a
saved chart on the Metrics main page:
- Click on the Metrics icon in the top button bar
- In the Saved Chart pulldown, select the saved chart you wish to modify
- In the fields for Chart Layout, Input Records, and Chart Title make the
desired changes
- Click on the "Save" button
Save as New
The "Save as New" operation allows you to save a new chart
based on the settings displayed on the "Select a Saved Chart"
page or when
previewing a saved chart.
On the "Select a Saved Chart" page, this operation allows you to create
a new saved chart with different selections for Chart Layout,
Input Records, and Chart Title.
To use the "Save as New" operation on the "Select a Saved Chart" page:
- Click on the Metrics icon in the top button bar
- Make selections for the Saved Chart, Chart Layout, Input Records,
and Chart Title
- Click on the "Save as New" button
- Enter a name for the new saved chart, then select whether the
saved chart will be a group or personal saved chart. If you select "Group"
for the "Saved Chart Type" field, select the group that should have access
to this saved chart in the "Group" field.
- Click OK to complete the operation
To use the "Save as New" operation after previewing a saved chart,
click here for instructions.
Adding a Saved Chart
To create a saved chart, perform the following steps:
- Click on the Metrics icon in the top button bar
- Click on the "Add" button to the right of the "Saved Chart" pulldown
- Enter a name for your Saved Chart in the "Saved Chart Name" field
- In the "Saved Chart Type" field, select whether this chart will be a personal or group
saved chart. Selecting "Group" indicates that any member of the
user group selected in the "Group" field below will be able to access this
saved chart.
- If "Group" is selected in the field "Saved Chart Type" above, select
which user group will be able to access this saved chart in the "Group" field.
- Click "Next" to continue
- Select the criteria for the Saved Chart. Click
here for full details of the criteria selections for a saved
chart.
- Click on the Add button
Editing a Saved Chart
To edit a saved chart, perform the following steps:
- Click on the Metrics icon in the top button bar
- Select a saved chart in the "Saved Chart" pulldown
- Click on the "Edit" button to the right of the "Saved Chart"
pulldown
- Make changes to the criteria of the saved chart
- Click OK to save the changes
Deleting a Saved Chart
To delete a saved chart, perform the following steps:
- Click on the Metrics icon in the top button bar
- Select a saved chart in the "Saved Chart" pulldown
- Click on the "Delete" button to the right of the "Saved Chart"
pulldown
- Click OK to confirm the operation
Preview a Saved Chart
The preview operation allows you to make changes to the
criteria of a saved chart before using the "Show Chart"
operation to display the chart. This operation is useful when
you want to display a chart with a change in the criteria for a saved chart,
but want to preserve the saved chart's original settings.
This is also useful for creating a new saved chart based on the criteria
of an existing saved chart.
To preview a saved chart, perform the following steps:
- Click on the Metrics icon in the top button bar
- Select a saved chart in the "Saved Chart" pulldown
- Click on the "Preview" button to the right of the
"Saved Chart" pulldown
- If desired, make changes to the criteria
- Click "Save" to save your changes. To create a new saved chart
with the criteria displayed, click on the
"Save as New" button. Otherwise, click on the "Show Chart" button
to display the chart.
- If you clicked on the "Save as New" button, you will be prompted to
select a name, chart type, and group for the new saved chart.
Saved Chart Criteria
Each saved chart has criteria which defines the data and formats that will
be displayed when the chart is generated. The options available when
creating a saved chart are explained below:
- Default Chart Layout
Select a chart layout to be used with this saved chart. For information
on creating a Chart Layout, click here.
- Default Input Records
This option determines which records will be included when displaying the chart.
Select "<All Records>" to include all records in the database or choose a Saved Query
to limit the records included in the chart.
- Default Chart Title
Enter a title to be displayed at the top of the chart
- Calculate the ... (y-axis for a line chart)
Select a calculation to be done on the set of records you chose in "Default Input Records"
above. If you selected a Chart Layout to produce a line chart, the selection made in this section
will become the y-axis when the chart is displayed.
- number of input records
Selecting this option indicates that the number of records included in the chart data will
match the number of input records determined by the "Default Input Records" field.
Example 1: If you select this option and "<All Records>" is selected for
"Default Input Records", the chart data will display all records in the database.
Example 2: If you select this option and a Saved Query is selected for
"Default Input Records", the chart data will display all records in the database that
match the criteria in the Saved Query selected.
- calculated value of an Integer or Float field
Selecting this option indicates that a calculation (average, total, minimum, maximum)
should be performed on the values of an Integer or Float field present in the set of records selected
in "Default Input Records".
Example: If you select this option and "average" value of "Estimated Size" field, then
the chart will calculate the average value of the Float field called Estimated Size within the
set of records selected for "Default Input Records".
- calculated time between 2 date fields in a particular date increment
This option allows you to calculate a time (average, total, minimum, maximum) between the
values of 2 date fields in a set of records.
Example: If you select this option and "average" value from "Date Reported" to
"Fix Date" in "days", then the chart will calculate the average time in days between the
date fields selected for the set of records listed in "Default Input Records".
- calculated time for record to progress from one state to another
This option allows you to calculate a time (average, total, minimum, maximum) between
the time a record was in a particular status (state 1) to the time when a record was in
another status (state 2)
over a set of records. This calculation uses the Record History to compare the date a record was
in state 1 to the date a record was in state 2. The calculation will be the same if a record
moved directly from state 1 to state 2 or passed through other states before moving to state 2.
Example: If you select this option and "average" value from "Reported" to "Closed"
in "days", then the chart will calculate the average time in days it took a record to go from
the Reported state to the Closed state.
- number of records added
Selecting this option indicates that the number of records included in the chart data will match the
number of records created within the set of records listed in the "Default Input Records" field.
- number of transitions to a state from another state
This option allows you to calculate the total number of transitions that were made into
a state (state 2) from another state (state 1). Selecting the option "<Any State>" for state 1 indicates
that all transitions that moved a record from any state (including state 2) into state 2 will be included
in the chart data. Selecting the option "<Any Other State>" for state 1 indicates that all transitions
that moved a record from any state (except state 2) into state 2 will be included in the chart data.
This calculation yields the total number of times a transition between 2 states occurred. The calculation
will count each time the transition occurred even if it occurred on the same record multiple times.
Example: If you select "Scheduled" as state 2 and "Reported" as state 1, then the calculation
will be the total number of times any record moved from the Reported state to the Scheduled state.
- number of records moved to a state which passed through another state
This option allows you to calculate the total number of records that moved to a state (state 2)
and passed through another state (state 1). Selecting the option "<Any State>" for state 1 indicates
that the calculation will yield any record which has moved to state 2. Selecting a specific state for
state 1 limits the calculation to records that passed through state 1 and state 2.
Unlike "number of transitions," this calculation will not include multiple
"hits" for the same record. Even if the same record passed from state 1 to
state 2 multiple times, it will only count the record once as it is counting number
of records and not number of transitions. Also, if a record loops while in state 2,
the record is assumed to have completed the move from state 1 to state 2, when it
first moves into state 2. This calculation can take a long time to run.
- Perform calculations ... (x-axis for line chart)
Select an option to add a further constraint to the data that resulted from the option in the
Calculate the ... (y-axis for line chart) option above.
- for every option menu item in a pulldown field
Selecting this option will perform the calculation selected in the
Calculate the ... (y-axis for line chart) option above for
every option menu item within the pulldown field selected.
Example: If you select this option and "Status" as the pulldown field,
the chart will display a separate calculation for each Status in your database.
- as of the current date and time (single calculation)
This option indicates that the chart should perform the calculation selected in the
Calculate the ... (y-axis for line chart) option above
as of the current date and time.
- as of the end of or during a time increment for the previous X time increments
This option indicates that the chart should generate the calculation selected in the
Calculate the ... (y-axis for line chart) option above as of the end of or during
each time increment for the number of increments selected.
Example: If you select "as of the end of" each "day" for the previous "2" "weeks", the chart
will generate 14 calculations
(one value for the calculation as of the end of each day for the last 2 weeks).
Dates are displayed as two part dates (month & day),
except that the first (left most) calculation and any calculation
that begins a new year will include a three part date (month, day, and year).
All date parts are displayed using 2 digit values (with leading zeros if necessary),
including the year.
The date format is based on the personal preference of the user who clicked Show Chart.
The time zone used for calculations (to determine midnight of a date) is
the time zone specified in personal preferences of the user who clicked
Show Chart.
If you select "during each week" or "during each month," each week or month will
be displayed as two dates with a hyphen between the two (a date range).
When you select week or month, the calculation may include a partial week or month as
the most recent value (month to date, week to date) so that it always includes information
up to and including the current day. Selecting month will always give you a partial
month for the most recent (right most) value, unless today is the last day of the
month. When you select "during each month," the months will
always begin on the first of the month. When you select "as of the end of" or "during"
each week, for the previous N weeks, you will always get data for a full week in each
calculation. However, if you select "as of the end of" or "during" each week for the
previous N months or years, you may get a partial week value (so that the data includes
exactly N months or exactly N years). To get data that always includes exactly one
week for each data point, use N weeks (rather than N months or N years).
- as of the end of or during a time increment for a date range
This option indicates that the chart should generate the calculation selected in the
Calculate the ... (y-axis for line chart) option above as of the end of or during
each time increment for the specified date range. If you do not enter a value for the end of the date range
(second date), the chart will use the day on which the chart is run (it will use today
as the value). The dates you enter should not include a time component (only month, day,
and year).
Example: If you select "during" each "day" from "01/01/2002" to "01/05/2002", the
chart will generate 5 calculations
(one value for the calculation during each day in the date range specified).
Dates are displayed as two part dates (month & day),
except that the first (left most) calculation and any calculation
that begins a new year will include a three part date (month, day, and year).
All date parts are displayed using 2 digit values (with leading zeros if necessary),
including the year.
The date format is based on the personal preference of the user who clicked Show Chart.
The time zone used for calculations (to determine midnight of a date) is
the time zone specified in personal preferences of the user who clicked
Show Chart.
If you select "during each week" or "during each month," each week or month will
be displayed as two dates with a hyphen between the two (a date range).
When you select week or month, the calculations may include a partial week or month
at the beginning and/or end, as necessary to fit within the date range. If you select
"during each month," months are displayed from the first of the month to the end of
the month, with the possible exception of the first and last months displayed. The
first month may be a partial month if your date range does not begin on the first of
the month. Your last month may be a partial month if your date range does not end on
the last day of the month.
- Breakdown calculations by a pulldown field
Checking the box for this option indicates that the calculations generated based on
the selections made above should be broken down by a pulldown field. For each calculation,
a value will be displayed for each option menu item in the pulldown field selected.
In addition, if the chart layout selected for the saved chart contains a legend, one
legend entry will be present for each option menu item in the pulldown field selected.
Example: If you enable this option and select "Status", the chart will display
a calculated value for each state in your database.
- Don't chart data for a breakdown value if its data is all zeros
Checking the box for this option indicates that a calculation for a particular option menu
item in the field selected for "Breakdown calculations by a pulldown field" should not appear
on the chart if its value is zero.
Saved Chart Layouts
A saved chart layout provides the formats used to display a saved chart.
A saved chart cannot be displayed without selecting a saved chart layout.
Examples of the formats that a saved chart layout provides are:
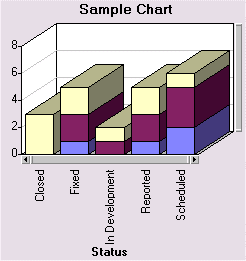
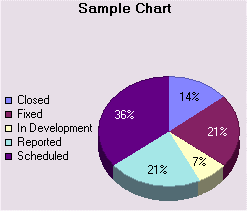
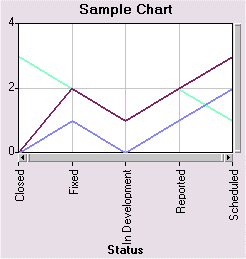
- whether a chart is a bar, pie, or line chart
- whether a legend should be displayed
- whether labels should be displayed to reflect the names of the data categories
To create a saved chart layout, perform the following steps:
- Click on the Metrics icon in the top button bar
- In the "Chart Layout" field, select the default saved chart layout that
corresponds to the chart type you wish to use. For example, if you wish
to create a saved chart layout for a bar chart, select
the default saved chart layout called "Bar - default [Users]"
- Click on the "Add" button to the right of Chart Layout field
- Enter a name for your saved chart layout in the "Chart Layout Name" field
- In the "Chart Layout Type" field, select whether this layout will be a personal or group
layout. Selecting "Group" indicates that any member of the
user group selected in the "Group" field below will be able to access this
saved chart layout.
- If "Group" is selected in the field "Chart Layout Type" above, select
which user group will be able to access this saved chart layout in the "Group" field.
- Click "Next" to continue
- Select the options for the Saved Chart Layout. Click
here for full details of the options available for a saved
chart layout. A sample chart is displayed in the lower right corner of the page.
As you make selections to the chart layout options, the sample chart will reflect
these changes.
- Click on the Add button to save the chart layout
Chart Layout Options
The Chart Layout Options determine the formats used to display the
data of the saved chart selected.
The following chart options are available for any chart type (bar, pie, line):
- Width x Height
Enter the dimensions of the area that should be used to display the chart.
We recommend using "600 x 400" so that the chart area is visible within the
bounds of a user's screen when the browser window is maximized. Using a
setting like "800 x 600" or "1200 x 800" will cause most users to have to use
a browser's scroll bars to see the full chart area.
- Label Length
A label in the chart is generated from the records included in the chart data.
Enter the maximum number of characters allowed for a label in the chart.
If a data field is longer than the number of characters specified here, it will
be truncated when used as a chart label.
- Display dynamic layout options (below) with chart
Checking the box for this option will display the chart layout options below a chart generated
by using the "Show Chart" operation. This option enables you to make changes to
a chart's layout options after the chart is displayed without altering the original
saved chart layout.
Each chart type (bar, pie, line) has its own set of chart layout
options as follows. Click on the link below to see the options that correspond to
the chart type selected. For all chart types, checking the box to the left of the option
enables the option to be applied to the chart layout:
Bar Chart Options
Pie Chart Options
Line Chart Options
Bar Chart Options
To obtain a summary report, click on the Metrics icon in the top button bar, then
click on the "Go To Summary Reports" button. The following summary reports are currently
supported:
 NetResults ProblemTracker

