|
||
|
|
Overview
Note: This feature is only available in NetResults Tracker Enterprise Edition.
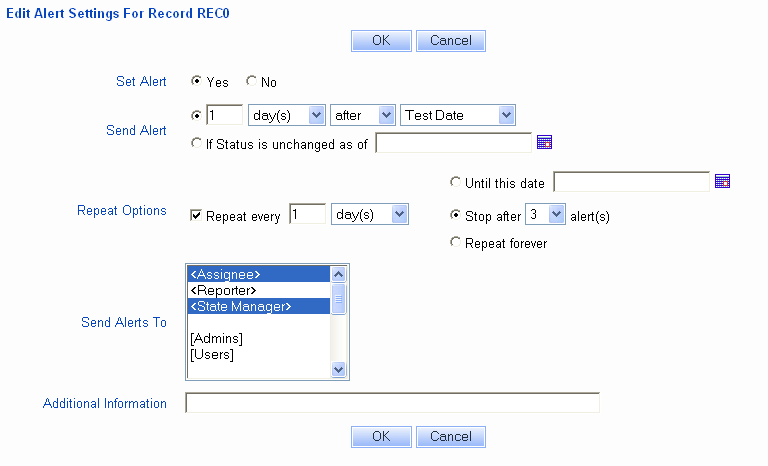
 Alerts are a form of email notification messages that can be triggered based on date field
in a record (e.g. to remind a user about a record at a certain date and time
such as "2 days after the 'Date Reported'") or triggered by a lack of change
in a record's state within a certain time period (e.g. a record should not stay within
a particular state for longer than 2 days. If it does stay in the state longer than 2 days,
alerts are triggered).
Alerts can be configured per record. Each record can have different alert settings including when, how, how often and to whom the alerts should be sent.
Alerts can be configured based on the form that was used to submit the record, based on a selection made in a certain field or based on the workflow transition used to process the record. With the necessary privileges, users can override these alert settings during the Add or Task operations.
When configuring alerts, a fixed date and time can be entered or a date and time relative to a date field within the record can be used. In addition, alerts can be sent once or configured to repeat periodically. Any combination of users and / or user groups can receive alerts for a particular record.
Enabling the Alerts Feature
Performing the following steps will allow you to enable the Alerts feature in your workgroup:
Enter the Alerts license key in the License Manager
You must enter a license key into the
License Manager in order
to use the Alerts feature.
Enable Alerts in the General Preferences section
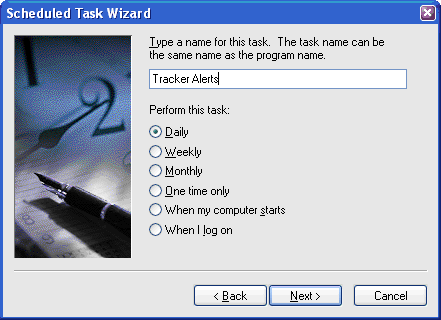
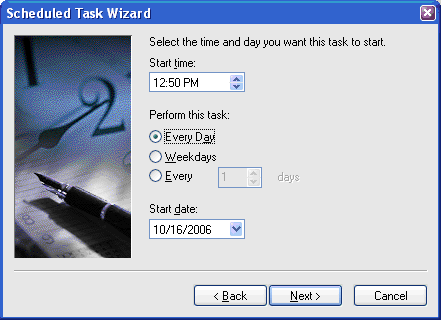
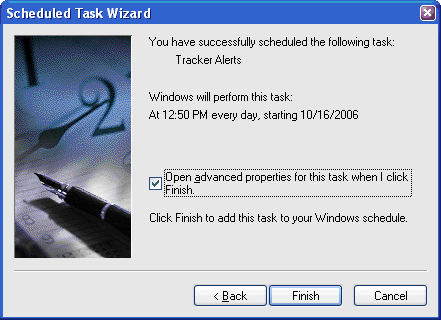
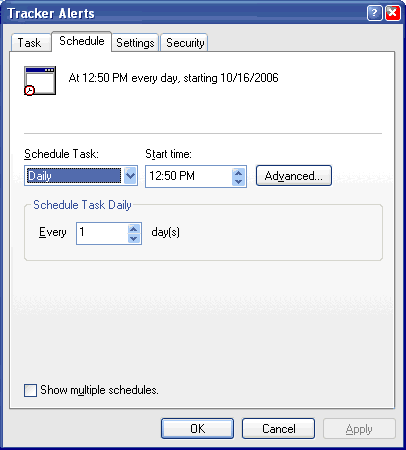
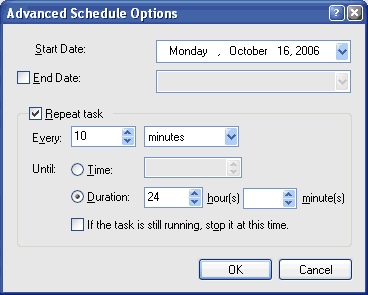
Create a Scheduled Task for the Alerts Feature
Alerts must be configured in the Scheduled Tasks section of the Control
Panel on your Tracker server. To create this scheduled
task, perform the following steps:
CScript.exe "<PTAlerts.jse file path>" //B //H:CScript
where <PTAlerts.jse file path> is the path where the PTAlerts.jse file resides. As mentioned above, by default, this path is C:\Program Files\NetResults\Tracker. Using the default path as an example, the Run field should have the following entered:
CScript.exe "C:\Program Files\NetResults\Tracker\PTAlerts.jse" //B //H:CScript
Please note that the PTAlerts.jse file path should be enclosed with double quotes.
Configure SMTP Mail Server for use with Alerts
An SMTP mail server is required to generate the alert notification
messages. This can be configured in the
Email Configuration section.
Ensure an email address is entered for the users that will receive alerts
A valid email address is required for a user to receive alerts. Email addresses
are entered in a user's profile in the
User Administration section (if the
Tracker Administrator has the appropriate privileges to edit
user profile information) or in the
User Management System.
After enabling the Alerts feature using the steps above, configure the user group privileges and default settings for Alerts as described below.
Alerts User Group Privileges
The following are the user group privileges related to the Alerts feature. These privileges can be set in the User Group Privileges page of the User Administration section. These privileges will only be displayed in the Privileges page if Alerts has been enabled using the steps in the section above.
Configuring Alerts Settings during Add Operation
Alert settings for the Add operation can be configured per form. You can also configure alert settings based on the option menu item selected in a particular field on the form (e.g. Based on Product, Priority, Severity or any other pulldown you have defined). The alert settings you configure for each form can be applied automatically as records are added to the system or you can allow the end users to see and change the alert settings when they are adding a record to the system.
Alert settings for forms can be configured in the Managing Workflows section.
Configuring Default Alert Settings for Transitions
Alert settings can be configured for each workflow transition. Alert settings can be configured for each transition such that these settings will be applied to any record processed with the transition. It is also possible to allow users to be prompted to configure the Alert settings during the Task operation.
Alert settings for transitions can be configured in the Workflow Transitions section.
Editing Alert Settings
A user can edit the alert settings for a record if they have the required privileges. If a user is a member of a group with the Edit Own Alerts user group privilege, the user can modify the alert settings for a record in which they are the Assignee. If a user is a member of a group with the Edit Alert Settings privilege, the user can modify the alert settings for any record.
A user meeting the criteria mentioned above can edit the alert settings for a record by clicking on the Edit icon in the top button bar and entering a record number or by clicking on the Edit icon next to a record number in a report on the Query or Home page. Clicking on the Edit Alerts button will display the following alert settings for the record:
