|
||
|
|
Use the following steps to import option menu items into a pulldown field.
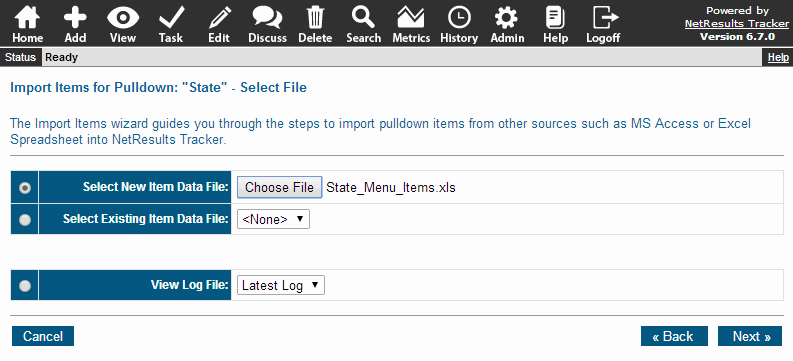
If you would like to import data from a new file, select the "Select New Item Data File" option and click Browse to browse to the location of the data file (the Microsoft Access database or Microsoft Excel spreadsheet that contains the data you wish to import). The file you selected will be copied into the import folder that corresponds to the user who is logged in.
Or, if you would like to import data from a file that was used for a previous import attempt, select the option "Select Existing Item Data File", then select a file in the pulldown.
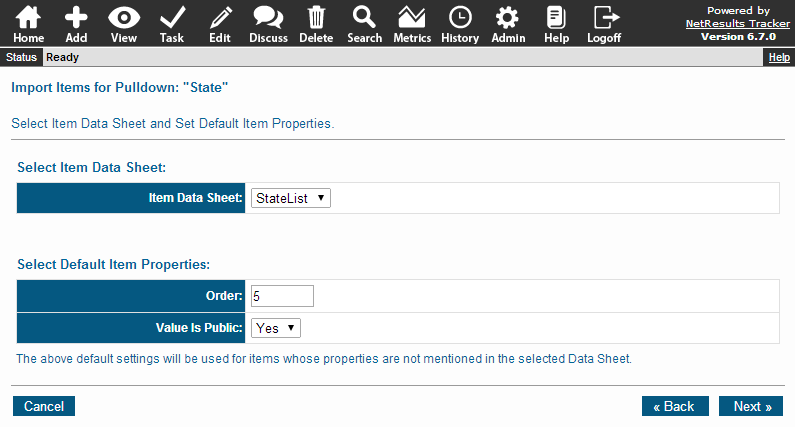
For Select an Item Data Table/Sheet, select the table/sheet in the Item data file that contains the option menu items that you wish to import.
In the Select Default Item Properties, make selections for properties the option menu items will inherit if they are not specified in the Item data file. For Order, enter a non-negative integer to specify the order in which the item should be displayed relative to other items. For Value is Public, select "Yes" if the items should be available for selection when the pulldown is displayed on the Submit Page or on the Knowledge Base Search Page. Select "No" if the items should not be available on these pages that are available to unregistered users.
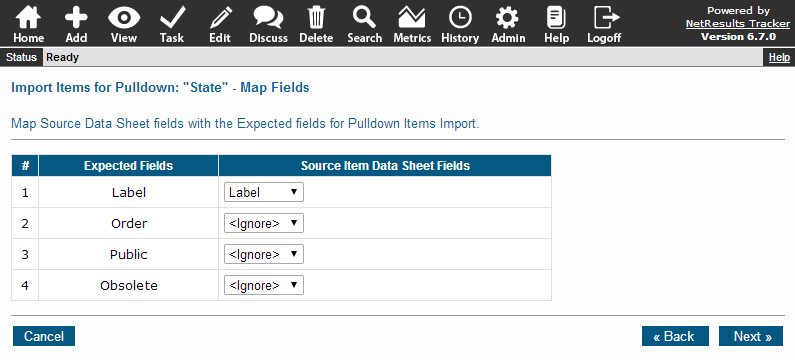
For Source Item Data Table/Sheet Fields, select the column heading that corresponds to the property in the Expected Fields column. If the Item data file does not contain columns for the Order, Value is Public or Obsolete properties, select "<Ignore>". When selecting <Ignore> for Order or Value is Public, the items will inherit the settings selected for Select Default Item Properties on the previous page. When selecting <Ignore> for Obsolete, the items will be set such that they are not obsolete.
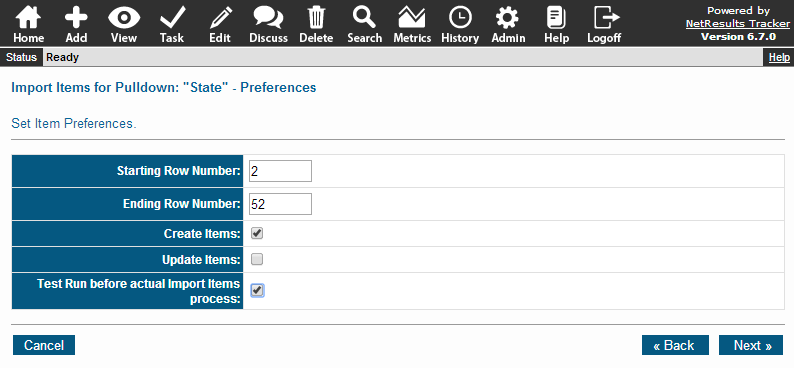
Starting Row Number
Enter the number of the first row in the user data file that contains the data you wish to import.
This is generally "1" (the first row after the column name row) unless you wish to import only some
of the data in the user data file.
Ending Row Number
Enter the number of the last row that contains the data you wish
to import from the data file
Create Items
Check the box for this option if you want the import tool
to create a new item in the pulldown field for each item in the Item data file
that does not match an item that already exists in the
pulldown field
Update Items
Check the box for this option if you want the import tool
to update any item in the Item data file that matches an item that already
exists in the pulldown field. For example, let's say the value "Product A" already
exists in the pulldown and has Order set to "10" and Value is Public set to
"Yes" and the Item data file contains a row for "Product A" with Order set to
"5" and Value is Public set to "No". If the "Update Items" box is checked,
the import tool will change the properties for the item "Product A" to reflect what is
specified in the Item data file (Order will be changed from "10" to "5" and
Value is Public will be changed from "Yes" to "No").
Test Run before actual Import Items process
Checking the box for this option will configure the import tool to run a test of the
import and display the results before actually importing any items into
the workgroup. Enabling this option is recommended as it will help you find
any data inconsistencies that might have been missed during the
data preparation process.
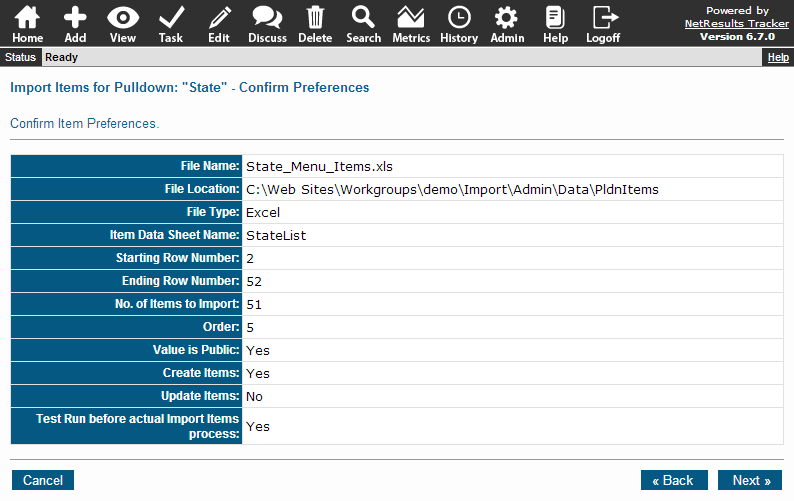
Click on the Back button if you wish to make any changes to the import settings, click Cancel if you wish to cancel the import or click Next to proceed.
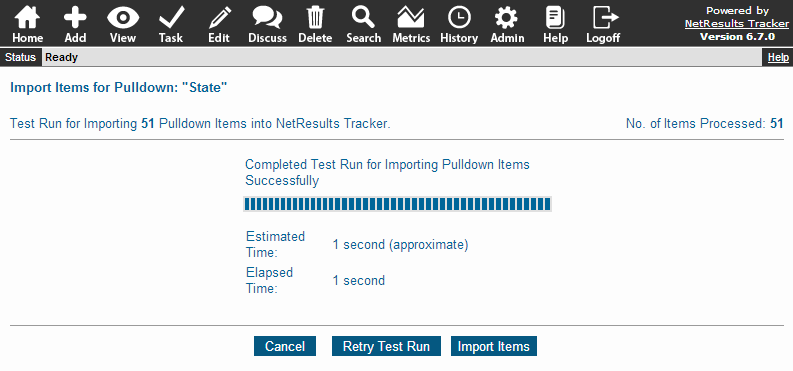
If the test run was successful or you did not enable the Test Run option, click on the Import Items button to run the actual import. The results will be displayed. Click on the Return to Pulldown Menu Items button to return to the items list.
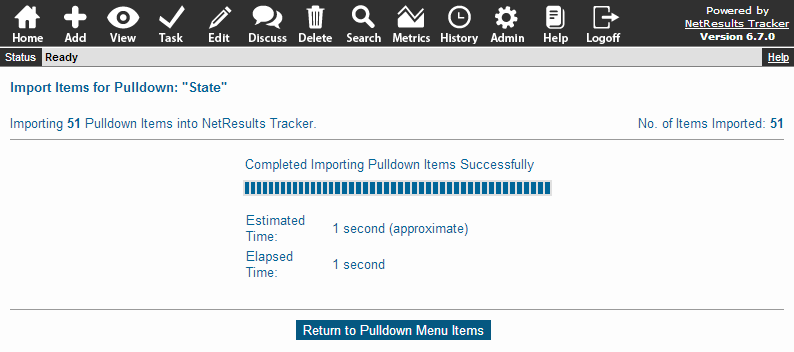
If the import was unsuccessful, details will be displayed. Review the details for information about how to correct the issues. In most cases, it is a matter of correcting the data so it adheres to the data standards. After making corrections to the data file that is in the PldnItems folder, you can click on the Retry button to attempt the import again. The import will begin from the first problem item. For example, if you tried to import rows 1 - 10 and row 5 triggered an error, when you click on the Retry button, the import will begin with row 5 instead of starting from row 1.
NetResults Tracker © 1997-2014 NetResults Corporation. All rights reserved.