|
||
|
|
The View Page, a read only page, is where all the information in a record such as fields, attachments, source code files, clone information, alerts, discussion and record history can be viewed.

There are two ways to view a record:
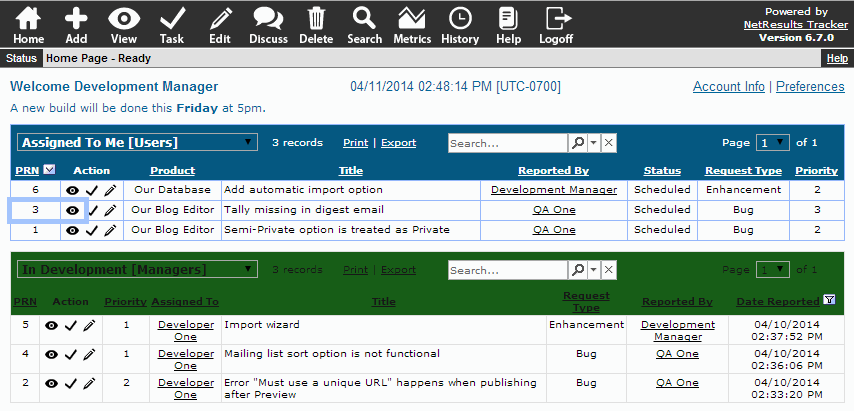
From a report on the Home or Query pages:
Click on the View icon to the left of a record in the report

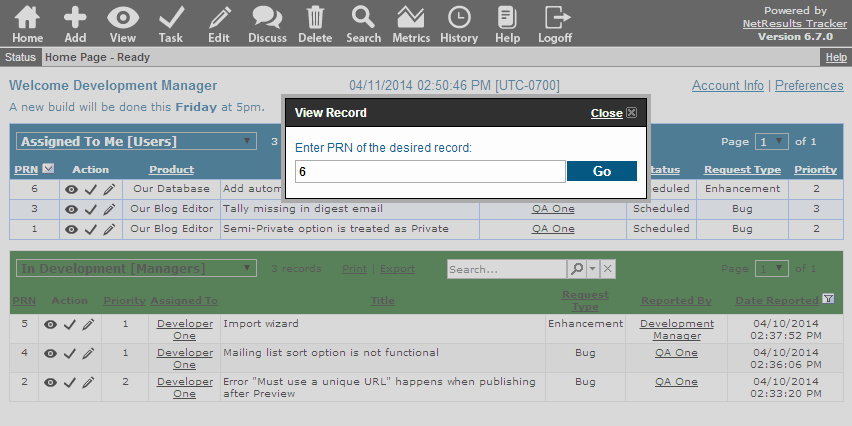
Using the View icon on the Button bar:
Click on the View icon on the Button Bar at the top. The Search
Window will appear. You can enter the record number you would like to
see and click Go to go to the View Page for the record number specified.

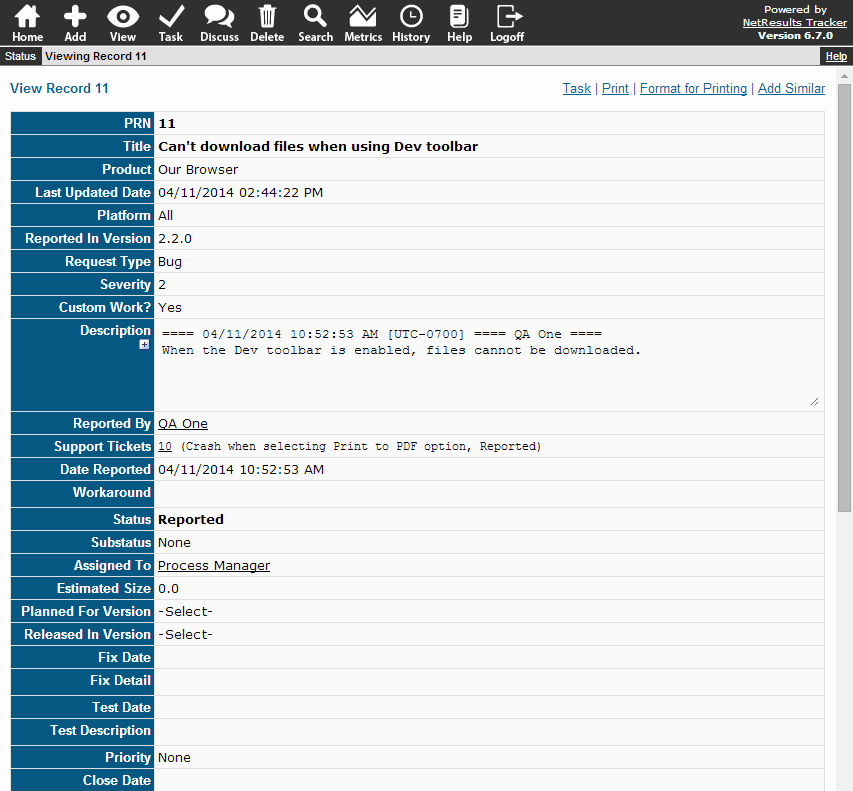
The top section of the View Page consists of the record fields. The last time the record was modified is listed in the Last Updated Date field. This field may have a different label or may not be visible on the View Page depending on how it was configured by the Tracker Administrator. Other fields that are available are based on the configuration set up by the Tracker Administrator.
The field help will be displayed if you have checked the box for the
Enable Field Help
preference
and your Tracker Administrator has entered information to describe this field
with this feature enabled.
If a Field Help icon
 is
displayed, move your cursor over the icon to see a description of the field.
Key Fields
Because Tracker can support multiple projects and forms, the Tracker Administrator can select key fields when creating a form. Key fields are important fields that allow you to perform searches for Link Fields, which are a special type of field that allows records to be cross-referenced. To find out which fields are the key fields for a certain form, go to the View Page for a record. The values of the key fields will be displayed in bold. In the View Page sample, the fields "PRN" and "Title" are the key fields as their values are displayed in bold.
Viewing User Information
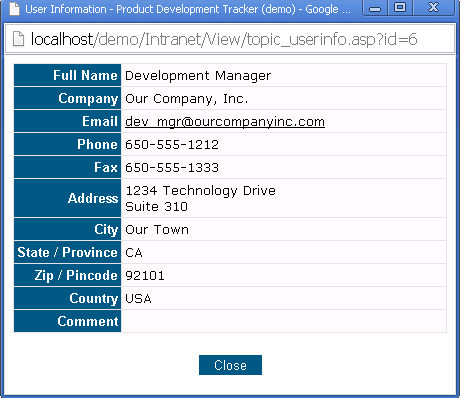
If you have been assigned permission to view user information and either the "Assigned To" or "Reported By" fields are displayed on the View page, you can click on the user's name to display the user's profile information such as phone, email, and address as shown below.

Expanding TextArea fields
To see the full contents of the TextArea fields, use the scroll bar to the right of the field. Click on the "+" to the left of the field to expand the TextArea field to see the full contents or click on the "-" to collapse the field back the default size. The "Description" field in the View Page sample has the "+" displayed to expand the field. To change the default number of lines displayed for a TextArea field, change the "Display Window" value in the Multi-line Field Settings section in your Preferences page.
Link Fields
Link fields are fields that allow records to be linked to one another. For example, if different types of forms are available in your Tracker workgroup, your Tracker Administrator may have set up Link field so records created by one form can be linked to records created using another form. When a Link field is included on the View Page, any records that have been linked will be displayed as a clickable link (e.g. "10" in the Support Tickets field in the View Page Sample are records that have been linked to the record being viewed). Clicking on one of the linked records will take you to the View Page of that record.
To view a file attachment or go to the location of a URL attachment, click on the attachment description.
To download a file attachment, click on the download icon.
More information can be found in the Record Attachments section.

If you have been assigned permission to view the source code list, it will be displayed. Any source code file(s) associated with the record will be included on the source code list.

Each file on the source code list can be compared with other versions of the file. To compare the difference between two versions of a source code, click on the Differences icon to the left of the source code file name. Enter a version number for the Problem Version. If you wish to compare the oldest version of the file, leave the Problem Version field blank. Enter a version number for the Fixed Version. If you wish to compare with the latest version of the file, leave the Fixed Version field blank. Click OK to see the differences.
A history is kept for each file on the source code list. To view the history of a file between two versions, click on the History icon to the left of the source code file name. Enter a version number for the Problem Version. If you wish to see the history since the oldest version of the file, leave the Problem Version field blank. Enter a version number for the Fixed Version. If you wish to see the history through the latest version of the file, leave the Fixed Version field blank. Click OK to see the history. More information on this feature, can be found in the Source Code Control section of this Help Guide.
If you have been assigned permissions to view clone information, this section will display information about and links to the "parent" record (one that the record being viewed was copied from) as well as the "children" (copies created from the record being viewed) of this record, if any. The information about parent and/or child records includes the record number, current status, and current assignee (owner). Additionally, if the record you are viewing is a clone (has a parent record), a parent link will be displayed in each section (Attachments, Record History, etc.) to allow you to quickly view the equivalent information in the parent record. For example, clicking on the parent link in the Attachments section will bring you to the View page for the parent with the page scrolled down to the Attachments section. The example below shows the record being viewed was cloned. Record 22 is the clone and is currently assigned to Developer One and in the "In Development" state.

The example below shows the record being viewed is a clone. Record 16 is its parent and is currently assigned to Developer One and in the "In Development" state.

Click here for more information about the Cloning feature.
If Alert settings (available only in Tracker Enterprise Edition) have been configured for a record and you have been assigned permissions to view the alert settings, these will be displayed. Examples of the information shown in the alert settings section are whether alerts are set for the record, the date and time an alert will be sent, and whether the alert will be repeated. The Alerts section of this guide provides more details about using this feature.

If a Discussion(s) (available only in Tracker Enterprise Edition) has been initiated for a record and you have been assigned permissions to view discussion messages, this will be displayed. The following discussion thread Information is displayed: the name of each thread, status (whether a thread has had new messages posted since you last viewed the thread), user who initiated the thread, number of messages, date and time of last update, and whether you are subscribed to the thread. The Discussion section of this guide provides more details about using this feature.

If you have been assigned permission to view the record history, it will also be displayed. More information about the information displayed in this section can be found in the Record History section.

If you've been given the Task privilege by your Tracker Administrator, you can task the record that you are currently viewing by clicking on the Task link in the upper right corner. This will take you to directly to the Task Page for this record.
If you've been given the Edit privilege by your Tracker Administrator, you can edit the record that you are currently viewing. Click on the Edit link in the upper right corner and this will take you directly to the Edit Page of this record.
To print a record, click on the Print link in the upper right corner or use your browser's print function.
To view the record in the print format, click on the Format for Printing link in the upper right corner of the View Page.
On the Format For Printing page, either click on the Print link in the upper right corner or use your browser's print function to print the record. To return to the View page, click on the Format for Viewing link in the upper right corner.
If you have been assigned permission to Clone (create a copy of) a record, there will be a Clone link in the upper right corner of the View page. When you click Clone (and click OK to confirm that you wish to clone this record) a new record will be added with the same values for all fields as the record you are currently viewing. After the clone operation completes, the record number of the new record will be displayed in the Status bar and you will be viewing the clone ("child" record). You can then use the Edit or Task function to modify some of the fields in the child record. You can also search for clones by setting the "Clone:" criteria on the Query page to "Yes" (or including "<Clone> is True" as a Query Phrase in an Advanced Query). Additionally, you can include information about clones in a Report Layout by selecting "(Clone)" (this will add a column that displays Yes or No based on whether or not the record is a clone of another record) and/or "(Parent PRN)" (this will add a column that displays the record number of the parent record if it has a parent or -1 if not) as a column.
Your Tracker administrator can also configure some Task operations (Transitions) to combine the Clone and Task function into a single operation (a Task operation that will clone a record and then modify the clone). Cloning from the Task operation allows much greater control over when a record may be cloned (based on the current Status of the record) and which fields (in the child record) must (or, optionally, may be) changed when a copy (clone) of a record is created. If your administrator has configured such Task operations, you may find that cloning from the View page has been disabled.
When the clone operation is performed, a Record History entry will be added to the parent record to note that a clone was created. Likewise, the child Record History will include an entry noting that it was created as a clone of another record. Information about "related" records is also available in the Clone Info section of the View page.
Note: When you use the Clone operation, only the fields will be copied from the original record. Associated information such as Attachments, Record History, Source Code File Associations, Discussion Threads, and Alert Settings will not be copied from the parent record. However, if you have been given permission to view clone info, you can easily view these items in the parent record by clicking on the parent link in the appropriate section of the child record (e.g. click the parent link in the Attachments section of the child to view the Attachments section in the parent). Also, if you use the Task operation to perform cloning, your administrator can configure (on a per Transition basis) whether or not to copy Attachments or Source Code File Associations to the clone (child record) during the Task operation.
If you don't wish to create an exact copy of the record you are viewing, but instead would like to add a new record that is similar to the existing record (or if you don't have permission to use the Clone operation), you can click the Add Similar link in the upper right corner of the View Page. This will bring you to the Add page and fill in all fields (that are displayed on the Add page) with values from the record you were viewing. You can then modify any field values and click the Add button to add a record similar to the one you were previously viewing.
Note: Unlike the Clone operation, no fields that are not visible on the Add page will be copied when you use Add Similar. Add Similar just sets the initial values for fields displayed on the Add page (it's as if you clicked the Add button and then set all the fields you see to exactly match those of the record you were viewing). In the case of the Status and Assigned To fields, it may not be possible to set these fields exactly as they are set in the record you were viewing because certain values may not be allowed on the Add page. If that occurs for either the Status or Assigned To fields, the Add page will be set with the default values for the Status and/or Assigned To field.
In general, Add Similar should be used when you want to create a new issue that starts at the first step in your workflow (business process). Clone should be used if you wish to have several issues share a common workflow (parent record) up to a certain point (step where the child records were created) or you wish to create (child) records to represent "subtasks" of the parent record (so, for instance, you could delegate parts of a larger task to other individuals and keep track of the status of the subtasks independently).
NetResults Tracker © 1997-2014 NetResults Corporation. All rights reserved.